Functions
So far, we've directly declared substances in our diagram, and we've learned how to define relationships between our substances by using predicates.
Now we will introduce functions in Penrose, which allow us to compose atomic substances in the diagram and define new substances based on existing ones. It's a very powerful feature that you will find super convenient in your journey as a Penrose diagrammer.
Goal
We've had a good time with Set Theory, now we will move on to visualizing vectors that you have most likely encountered in your high school physics or math class.
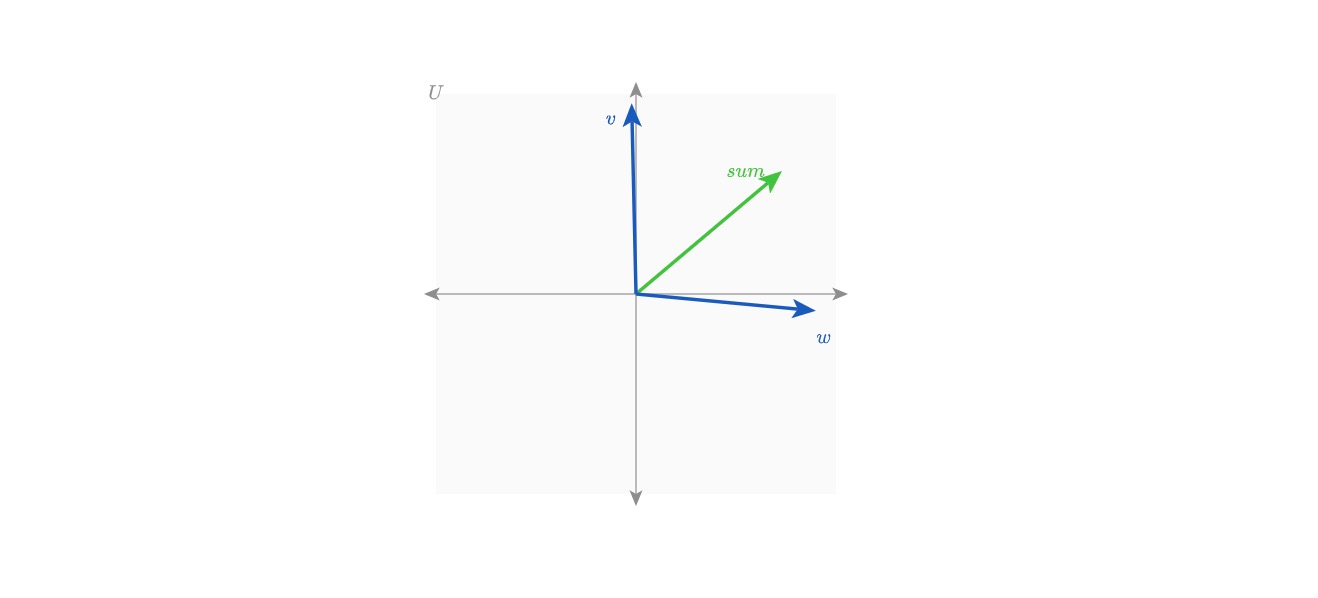
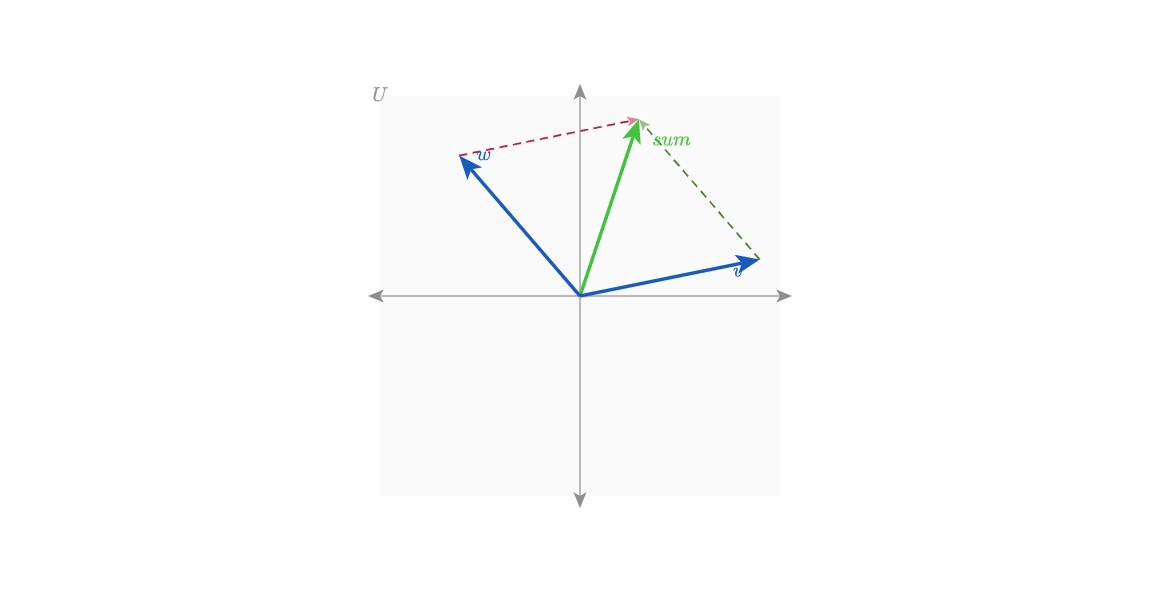
In particular, we are visualizing vector addition. Below is the goal diagram for this tutorial, which shows vector addition of vectors v and w, that results in a vector u = v + w. At the end of the tutorial, you will be able to work with functions in Penrose to create objects from existing objects, enjoying the convenience of compositionality.
Starter Code
👉 Open this online workspace in a separate tab to follow along!
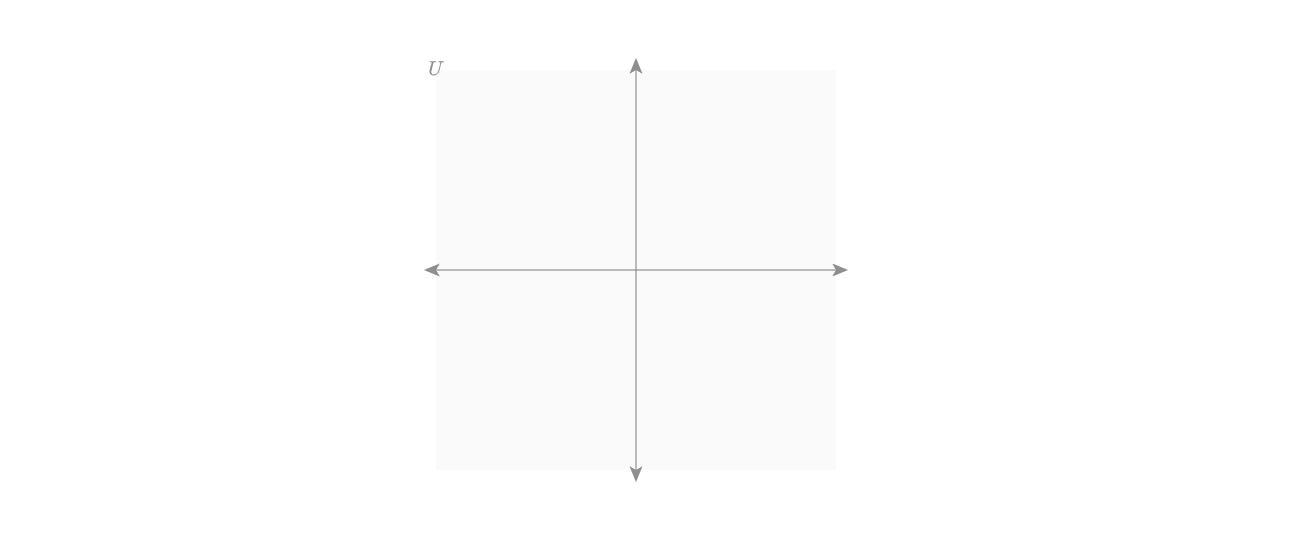
If everything is working, when you compile, you should see a vector space labeled U with its x-axis and y-axis in your Penrose window. It should look something like this:
There are comments in the starter code that document each block briefly. In this exercise we are mainly working on the .style file, so the given .domain and .substance file contains almost everything we need. This will be a common occurrence for you if you are a domain expert, crafting different visualizations for a domain.
For more in-depth explanations on the starter code, we prepared a separate document here.
Task 1: Vectors In Vector Space
Good news! Our Domain and Substance programs do not need to be altered for this task. Let's start by taking a look at the Style program.
📄 Style
The goal of Penrose is to visualize mathematical relationships.
These visual relationships can be represented in many different ways. Therefore, Penrose does not include any built-in numeric types. For example, when we define a Vector, we don't assign it concrete values (e.g. we don't write Vector v := (1,2)). Instead, we simply declare the Vector and associate it with a VectorSpace using the In predicate.
It's a good rule of thumb to NOT touch concrete numbers until we get into the .style file.
Every vector exists in a vector space, and we typically draw them from the origin of that space. In the given .domain file, you will find a defined predicate called In that takes in a Vector and a VectorSpace. The way we work with In is very similar to the Subset predicate we have worked with in tutorial 2.
We start by writing the selector, which catches any vectors that are in a vector space.
forall Vector u; VectorSpace U
where In(u, U) {
  /* draw a vector in vector space */
}
Remember, we use Penrose to visualize abstract relationships between objects. We do not have specific values in mind for the vectors, and we want Penrose to decide for us. To do that, we use the ? symbol to let Penrose know that we will be happy with an optimized value. Therefore we write:
u.vector = (?, ?)Next, vectors are commonly visually represented with single-head arrows ➡️, where the tail is anchored at the origin, and the head points at the vector position in space. Therefore we will need to assign some field of u to an Arrow shape object to draw an arrow on the screen.
u.shape = Line {
  start: U.origin
  end : U.origin + u.vector
  strokeWidth : 3.0
  strokeColor : const.lightBlue /* or any color you want */
  endArrowhead: "straight"
  endArrowheadSize : const.arrowheadSize /* feel free to play with other values */
}
Note that the field name shape could be replaced by anything you want, we just need to assign the pre-defined Penrose Line object to some field (remember in tutorial 1 we used .icon). Here we are simply defining some properties of the Line shape object.
Lastly, we need a field to write the variable name of our vector in the diagram.
u.text = Equation {
  string : u.label /* will be autofilled by Penrose because we set AutoLabel All in .substance */
  fillColor : u.shape.strokeColor /* this way it changes accordingly when we change the arrow's color */
}
Just one more step for this task. We will need to place some constraints on how we draw the diagram. Think about drawing a vector diagram by hand and make sure you've caught everything we need to watch out for:
- The
Vectoris inside theVectorSpace - The name of our
Vectoris beside our vector, and is inside theVectorSpace - The name of our
Vectordoes not get covered by the 2 axes
To represent these constraints to Penrose, we write the following:
ensure contains(U.background, u.shape)
ensure contains(U.background, u.text)
ensure vdist(u.shape.end, u.text.center) == 15.0

layer u.text above U.xAxis
layer u.text above U.yAxis
🔥 Yes! We are halfway there. Now you should see something similar to the following diagram. If you want to check your code, you can find the solution here. Look for the section in the .style file marked with "Task 1".

Task 2: Vector As Sum of Two Existing Vectors
📄 Domain
We will write our first function in Penrose together 💫!
/* new line in .domain file */
function addV(Vector, Vector) -> Vector
In Penrose, functions are declarative, just like everything else. Functions allow us to use defined elements to create new elements. They only have inputs and outputs. We will add a new line to our .domain file that defines a function called addV, which adds two vectors.
The syntax for functions is similar to defining elementary objects and predicates.
- As usual, we begin with the type keyword,
functionin this case. - Then we write the function name (
addV) followed by an open parenthesis(. - Next, we define the input types. We can add multiple input elements by connecting them with
,. These are the types of the existing objects that will be used. - Lastly, we write a close parenthesis
)and arrow->followed by the output type.
📄 Substance
Penrose is a purely functional language. So, when we have y = f(x), it's read like "y is defined as f(x)".
The syntax for composing a new object using a function in Penrose involves a new operator :=, which is the assignment operator. We write y := f(x) to define y as f(x).
The existing code in our sample file already defines the vectors v and w, so all we need to do is define our resulting vector, u. We can do this by writing u := addV(v, w). We also want to make sure that u is in our original vector space (denoted U) along with our existing vectors v and w. To do this, we can make use of the predicate In (which was defined in the starter code) by writing In(u, U).
/* new lines in .substance file ******/
Vector u := addV(v, w)
In(u, U)
/* autolabel on the last line */
AutoLabel All
📄 Style
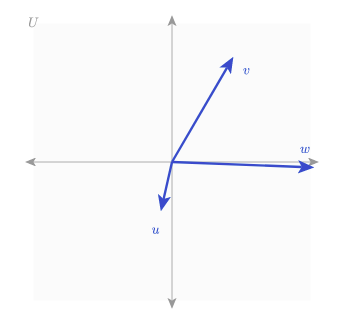
Though we have declared our function addV in the Domain program and defined that we want our Vector u to be the result of addV(v, w) in our Substance program, Penrose will not know how to visually represent the relationship u := addV(v, w) unless we make some changes to our Style program. If you re-compile your triple in its current state, you'll see that it is plotting 3 vectors arbitrarily, like this:
Again, we start with writing a selector. We have a bit more work to do, since we have 3 vectors and 1 vector space involved. We also need to make sure that u,v,w are all in the same vector space. Therefore, our selector will be the following:
forall Vector u; Vector v; Vector w; VectorSpace U
where u := addV(v,w); In(u, U); In(v, U); In(w, U)
Notice that we have chained together multiple predicates by separating them with a semicolon ;.
Now we can write our code to visualize the vector addition.
When we manually add 2 vectors, we add their x values and y values to get the new vector's x, y values. The new vector already has some x, y values chosen by Penrose for optimization, therefore we will need to override the existing values using the override keyword. (Every vector in a vector space is anchored at the origin, therefore we are only changing the endpoint of any vector. )
Since Penrose has built-in vector functionality (read about more features here), to get the sum of two vectors we simply need to add them using the + operator. But since all the vectors are offset by the origin vector, we also need to subtract the origin from our sum.
/* new lines in .style file */
forall Vector u; Vector v; Vector w; VectorSpace U
where u := addV(v,w); In(u, U); In(v, U); In(w, U) {
  override u.shape.end = v.shape.end + w.shape.end - U.origin
}
This is easier than you expected, right? You're all done with this tutorial! Take a sip of water and come back to solidify your knowledge with the following exercises. 🌴 Complete code for the example.
Exercises
FYI: All the sample goal diagrams are only a single sampling of many possible variations.
We follow the convention of u being the resultant vector, and use v, w for input vectors. As a reminder, documentation for the pre-defined shapes that are available in Penrose can be found here.
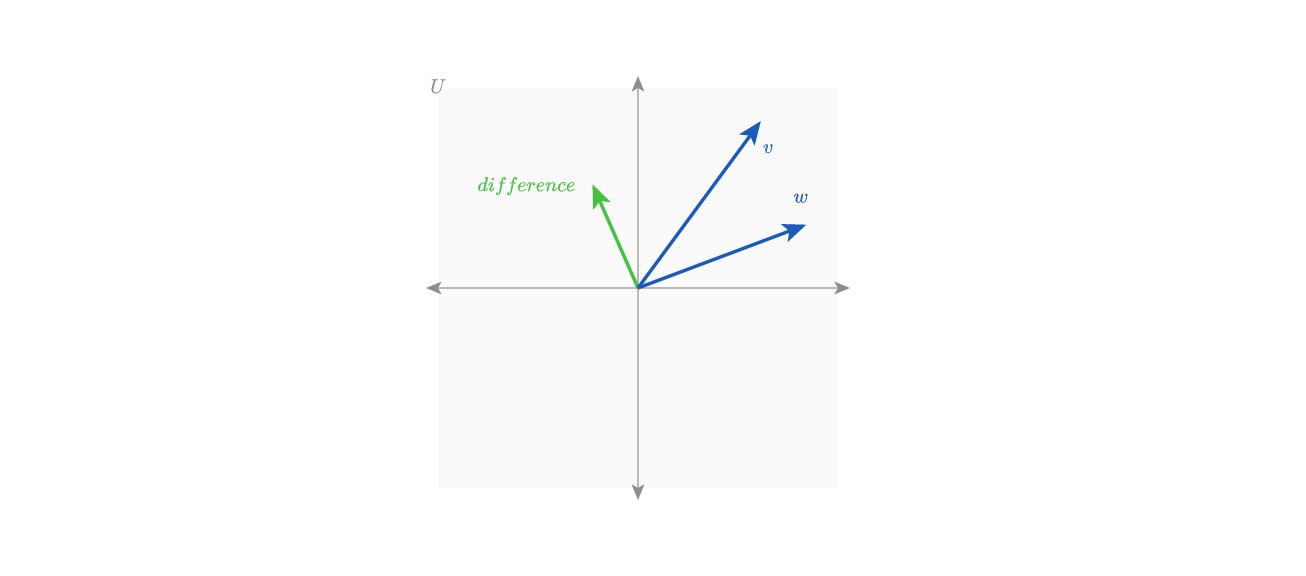
- Exercise 1: Create a new function that computes vector subtraction, and draws the difference vector, i.e.
u = v - w.
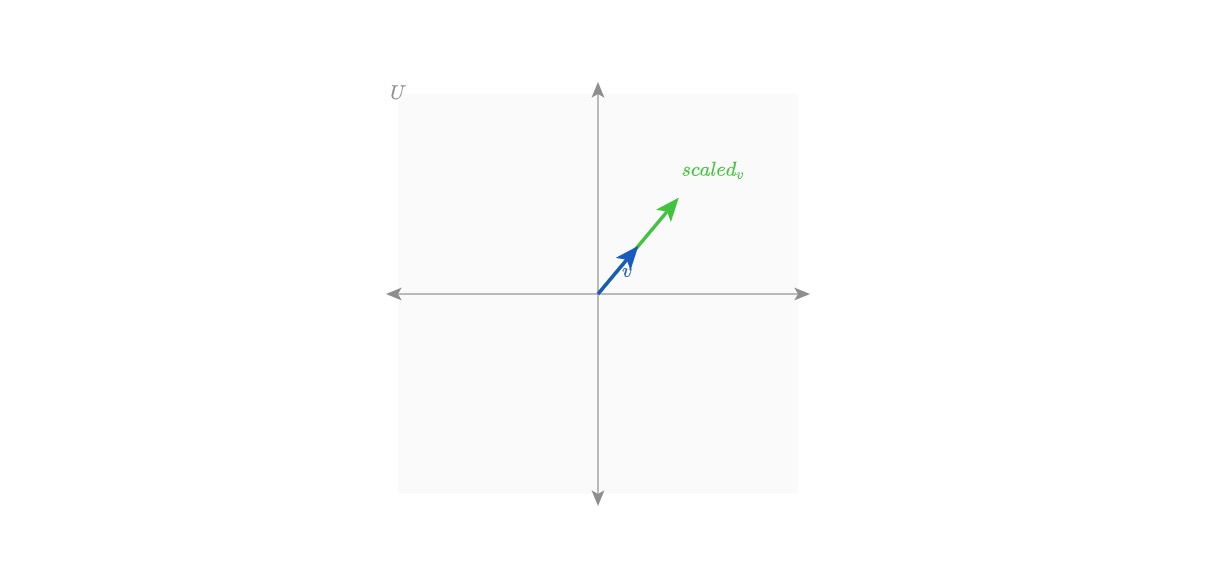
- Exercise 2: Create a new function that computes scalar multiplication, and draws the scaled vector, i.e.
u = a * vwhereais a scalar. Start with defining a new typeScalar, and define the function accordingly. With styles, first try having a fixed valued scalar, eg. let the scalar be5.0. Then make use of?and constraints to have arbitrary scalars. Hint:inRangeis a helpful function and(2, 5)is a nice bound.
- Exercise 3: Add more lines of code to the
addVblock in style file to visualize the Parallelogram method of vector addition.
📏 Parallelogram Method Steps:
- Anchor the two vectors
v, wat the same origin. This is already taken care of since we have been drawing our vectors from the origin. - Draw a line (often dashed) from the head of
vto the head ofw, now you have a parallelogram. - The diagonal from the origin point to the new connected point of
v, wwill be the sum vector's tail position. - Read more on parallelogram method here.
Takeaways
🧑🎨 Principles of Styling:
- Define base objects.
- In Exercise 2, we defined a
Scalar. Then we could useScalarin a function withVector, and we accessed its value to actually perform scalar multiplication! HereScalarandVectorare the atomic elements that we can play with and build more complex objects.
- In Exercise 2, we defined a
- Cascading styles.
- Very similar to CSS, we use selectors and inherit stylings from the atomic elements. When we defined new vectors from
addV, the new vector still has the same styling as other vectors.
- Very similar to CSS, we use selectors and inherit stylings from the atomic elements. When we defined new vectors from
- Override if needed.
- Penrose is purely functional, i.e. every value that is set is supposedly fixed. Therefore if you want to reassign a value, you need to use the
overridekeyword.
- Penrose is purely functional, i.e. every value that is set is supposedly fixed. Therefore if you want to reassign a value, you need to use the
💭 Substance is abstract! No numbers!
- The visual meaning is defined in the style program. This includes all numbers. We have built-in types such as
scalar, color, ...in our style program. - The substance program has no built-in functionality, meaning it is infinitely flexible.
- Define your world in the domain file. The domain program also has no built-ins.
🖋️ New Syntax:
.domainfunction funcName(inputType) -> outputTypeis the syntax for defining functions in.domain.
.substance:=is the assignment operator for composing objects.
.style?indicates an undetermined value that will be decided by Penrose for optimization.- We can do computation inside
.styleto draw objects in relation to some data.
🧗🏽 Onward!
You've completed the Penrose tutorial! If you're lost, check out the rest of the documentation, play with examples in the online editor, or get in contact with us.